Build package
Build ROBOTO_ORIGIN
RoboParty (Shanghai RoboParty Technology) · Humanoid · active · 2025
Fully open-source DIY running/jumping humanoid prototype whose structure, electronics, training and deployment code are all published; buildable from Taobao parts and JLC prototyping.
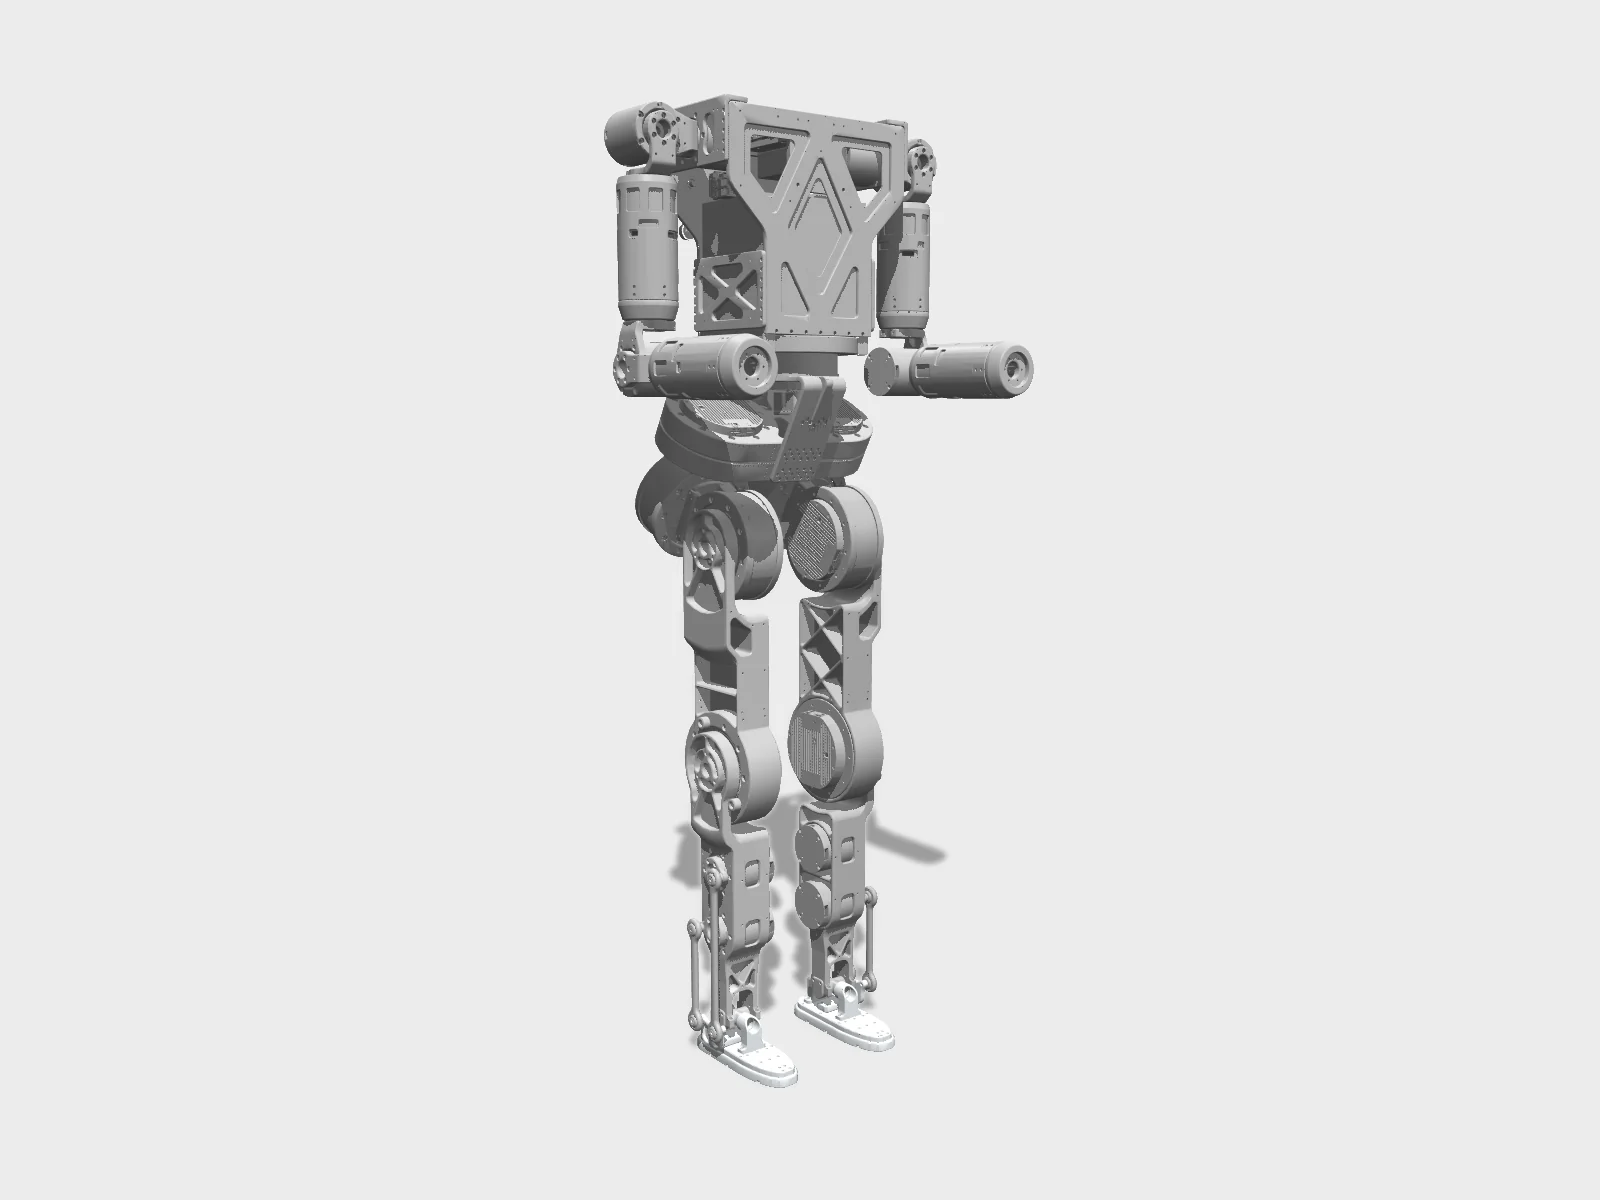
- Drawing
- /roboparty/roboto-origin
- Maker
- RoboParty (Shanghai RoboParty Technology)
- Country
- Shanghai, CN
- Package rev
- v0.1.0
- Level
- L1 Compiled
- Availability
- DIY
- Openness
- 100/100
- HW licence
- CERN-OHL-W-2.0
- Last checked
- 2026-09-25
- Height
- 125 cm
- Mass
- 34 kg
- DOF
- 23
- Actuators
- 120 N·m peak joint torque (maker claim)
Company founded Feb 2025; prototype built in ~4 months. Repo created Dec 2025, actively updated. Uses Isaac Lab / ROS 2. roboto_origin is a snapshot aggregation of the module repos. Specs are maker claims from the Original-0310 brochure in rpo_hardware (not in the README): 1.25 m, 34 kg, 23 DOF, 3 m/s, 120 N·m peak joint torque, 48 V 15 Ah battery, >2 h runtime. URDF and MJCF in modules/rpo_description. Licensing is per module (LICENSES.md): hardware (rpo_hardware, rpo_description, rpo_appearance) CERN-OHL-W-2.0; RoboParty software and firmware GPL-3.0-only; rpo_hardware docs CC-BY-SA-4.0; roboparty_train BSD-3-Clause; orangepi-build GPL-2.0. RoboParty names and logos are not licensed. Walking, motion-tracking, get-up and parkour policies ship as ONNX in roboparty_inference / roboparty_deploy.
Configure
Saved in the URL. Share the link to share the build.Source
One cart across 0 vendors · prices in USD as listed42 lines · 1,256 parts · 42 without an offer in US · 0/42 lines sourced in 2+ regions (L3 gate)
| # | Part | Category | Qty | Unit | Line | Offer |
|---|---|---|---|---|---|---|
No offer in this region42 lines · unpriced | ||||||
| 1 | Damiao DM-J4340P 48 V joint motor (ankles, arms) actuator.dm-j4340p · MPN DM-J4340P | actuator | 14 | unpriced | — | Offers in CN only |
| 2 | Damiao DM-J10010L 48 V joint motor (hip, knee, waist) actuator.dm-j10010l · MPN DM-J10010L | actuator | 9 | unpriced | — | Offers in CN only |
| 3 | Damiao FDCAN analyzer (motor ID setup and encoder calibration) electronics.dm-fdcan-analyzer | electronics | 1 | unpriced | — | No offer found yet |
| 4 | D-Robotics RDK X5 8 GB single-board computer compute.rdk-x5 · MPN RDK X5 8GB · 1 alt | compute | 1 | unpriced | — | Offers in CN only |
| 5 | SanDisk 32 GB high-speed microSD card (controller OS image) electronics.sd-card | electronics | 1 | unpriced | — | No offer found yet |
| 6 | RTC module for the controller electronics.rtc | electronics | 1 | unpriced | — | No offer found yet |
| 7 | Wi-Fi antenna, IPEX gen-1, 15 cm lead electronics.antenna | electronics | 1 | unpriced | — | No offer found yet |
| 8 | Controller cooling kit (heatsink/fan set) electronics.cooling-kit | electronics | 1 | unpriced | — | No offer found yet |
| 9 | HiPNUC HI14M0-USB IMU/VRU (USB-232), 921600 baud, 500 Hz sensor.imu · MPN HI14M0-USB · 1 alt | sensor | 1 | unpriced | — | Offers in CN only |
| 10 | Intel RealSense D435i depth camera (optional; needed for the parkour policy) sensor.depth-camera · MPN D435i | sensor | 1 | unpriced | — | No offer found yet |
| 11 | RBE_Board V2.0 / RBE_PWR_HUB V2.1 (RoboParty 3-in-1: 48→5 V buck, power distribution, 4-channel USB-to-CAN) electronics.rbe-board · 1 alt | electronics | 1 | unpriced | — | Offers in CN only |
| 12 | 48 V 15 Ah Li-ion pack, 140x140x115 mm (Fu Xiao Er) power.battery | power | 1 | unpriced | — | Offers in CN only |
| 13 | Li-ion charger with 3-pin aviation plug power.charger | power | 1 | unpriced | — | No offer found yet |
| 14 | WEIPU SF1212/S2 aviation connector (charge port) power.charge-port · MPN SF1212/S2 | power | 1 | unpriced | — | Offers in CN only |
| 15 | Emergency stop button, Lanbo M3 oxidized head, no light power.estop | power | 1 | unpriced | — | Offers in CN only |
| 16 | Metal push-button switch, self-locking, 5 V green ring light, with lead power.switch | power | 1 | unpriced | — | No offer found yet |
| 17 | Digital voltmeter (GH1.25 connection on the RBE board) power.voltmeter | power | 1 | unpriced | — | No offer found yet |
| 18 | Deep-groove ball bearing 130x165x18 (waist), GB/T 276-2013 structure.bearing-130x165x18 | structure | 1 | unpriced | — | Offers in CN only |
| 19 | Radial spherical plain bearing, G-series 8 mm, GB/T 9161-2001 structure.spherical-bearing-g8 | structure | 8 | unpriced | — | No offer found yet |
| 20 | Thrust needle roller and cage assembly AXK6085 (fit the cage only, not the two washers) structure.axk6085 · MPN AXK6085 | structure | 9 | unpriced | — | No offer found yet |
| 21 | Universal-joint cross bearing 16x40 (ankle) structure.ujoint-cross-16x40 | structure | 2 | unpriced | — | No offer found yet |
| 22 | Rubber sole pad (CAD: Roboto_Origin_ShoePad_01-0225.stp) structure.rubber-sole | structure | 2 | unpriced | — | No offer found yet |
| 23 | Metal carry handle (back) structure.handle | structure | 1 | unpriced | — | No offer found yet |
| 24 | Cable-tie mounts (listed as 1 set) other.cable-tie-mount | other | 1 | unpriced | — | No offer found yet |
| 25 | Gamepad with USB receiver (XInput mode) other.gamepad | other | 1 | unpriced | — | No offer found yet |
| 26 | Arm harness RBW_Origin_01-04 (Arm01-Arm04), XT30(2+2) to XT30(2+2), 20 cm, 2 of each cable.arm | cable | 8 | unpriced | — | No offer found yet |
| 27 | Leg harness RBW_Origin_05-09 (Leg01-Leg05), XT30U / XT30(2+2) with GH1.25 2-pin reversed CAN lead, 10-40 cm, 2 of each cable.leg | cable | 10 | unpriced | — | No offer found yet |
| 28 | RBW_Origin_10 Body01, XT30U-XT30U, 20 cm (waist 0x0D to right leg 0x07) cable.body01 | cable | 1 | unpriced | — | No offer found yet |
| 29 | RBW_Origin_11 Body02, XT30(2+2)-XT30(2+2), 20 cm (arms to RBE board) cable.body02 | cable | 2 | unpriced | — | No offer found yet |
| 30 | RBW_Origin_12 Body03, XT30(2+2)-XT30U, 60 cm (left leg 0x01 to RBE board) cable.body03 | cable | 1 | unpriced | — | No offer found yet |
| 31 | RBW_Origin_13 Body04, XT30(2+2)-XT30U, 50 cm (right leg 0x07 to RBE board) cable.body04 | cable | 1 | unpriced | — | No offer found yet |
| 32 | USB-A to USB-C 3.0 cable, 30 cm (controller to RBE USB-to-CAN) cable.usb-a-c | cable | 1 | unpriced | — | No offer found yet |
| 33 | USB-C to USB-C cable, 30 cm, flexible, fast-charge, side-bend (RBE 5 V to controller) cable.usb-c-c | cable | 1 | unpriced | — | No offer found yet |
| 34 | Socket head cap screws M2.5x8 (20), M3x6 (20), M3x8 (80), M3x10 (80), M3x12 (50), M3x16 (80) fastener.shcs-m2.5-m3 | fastener | 330 | unpriced | — | No offer found yet |
| 35 | Socket head cap screws M4x8 (200), M4x10 (100), M4x12 (100), M4x14 (20) fastener.shcs-m4 | fastener | 420 | unpriced | — | No offer found yet |
| 36 | Socket head cap screws M5x10 (80), M5x12 (100), M5x14 (100) fastener.shcs-m5 | fastener | 280 | unpriced | — | No offer found yet |
| 37 | Socket head cap screws M6x12 (2), M6x16 (2) fastener.shcs-m6 | fastener | 4 | unpriced | — | No offer found yet |
| 38 | Flat-head screws M4x8 (20), M4x12 (20), M5x16 (20) fastener.flat-head | fastener | 60 | unpriced | — | No offer found yet |
| 39 | Dowel pin 4x18, 45 steel, GB/T 119.2 (arm calibration pins) fastener.pin-4x18 | fastener | 30 | unpriced | — | No offer found yet |
| 40 | Dowel pin 4x22, 45 steel, GB/T 119.2 (leg calibration pins) fastener.pin-4x22 | fastener | 30 | unpriced | — | No offer found yet |
| 41 | Brass standoff M3x15+3 fastener.standoff-m3 | fastener | 10 | unpriced | — | No offer found yet |
| 42 | Lifting eye bolt M4, GB/T 825-1988 fastener.eye-bolt-m4 | fastener | 4 | unpriced | — | No offer found yet |
| Cart total · US | 1,256 | $0.00 | 42 lines unpriced, not in total | |||
Fabricate
Planned for a 256 mm bed- Fabricated parts
- 80
- Print time (sum)
- —
- Material (sum)
- —
- Plates · estimate
- —
No plate estimate: the package does not list grams per part yet, and we will not guess them. Slice the source files for your 256 mm bed.
| Part | Process | Material | Qty | h / part | g / part | Profile |
|---|---|---|---|---|---|---|
Arm 1 (RB000152_02) cnc.arm-1 | CNC | 6061 aluminium, 120-grit sandblast + black anodize | 2 | — | — | source |
Arm 2 (RB000153_02) cnc.arm-2 | CNC | 6061 aluminium, 120-grit sandblast + black anodize | 4 | — | — | source |
Arm 3 (RB000154_02) cnc.arm-3 | CNC | 6061 aluminium, 120-grit sandblast + black anodize | 4 | — | — | source |
Arm 4 (RB000155_01) cnc.arm-4 | CNC | 6061 aluminium, 120-grit sandblast + black anodize | 4 | — | — | source |
Arm 5 (RB000179_01) cnc.arm-5 | CNC | 6061 aluminium, 120-grit sandblast + black anodize | 2 | — | — | source |
IMU carrier plate (RB000156_01) cnc.imu-plate | CNC | 6061 aluminium, 120-grit sandblast + black anodize | 1 | — | — | source |
Side cross plate (RB000157_01) cnc.side-plate | CNC | 6061 aluminium, 120-grit sandblast + black anodize | 2 | — | — | source |
Inner thigh (RB000158_02) cnc.inner-thigh | CNC | 6061 aluminium, 120-grit sandblast + black anodize | 2 | — | — | source |
Battery bottom cover (with waist limit block) (RB000159_02) cnc.battery-cover | CNC | 7075 aluminium, 120-grit sandblast + black anodize | 1 | — | — | source |
Shoulder (RB000160_02) cnc.shoulder | CNC | 6061 aluminium, 120-grit sandblast + black anodize | 2 | — | — | source |
20 cm foot (RB000161_01) cnc.foot-20cm | CNC | 6061 aluminium, 120-grit sandblast + black anodize | 2 | — | — | source |
Sole connecting rod (RB000162_01) cnc.sole-link | CNC | 45 steel, black oxide | 2 | — | — | source |
Ankle roll connector (RB000163_01) cnc.ankle-roll | CNC | 6061 aluminium, 120-grit sandblast + black anodize | 4 | — | — | source |
Hip joint mount (RB000164_01) cnc.hip-mount | CNC | 6061 aluminium, 120-grit sandblast + black anodize | 1 | — | — | source |
Output flange connecting rod (RB000166_02) cnc.flange-link | CNC | 45 steel, black oxide | 4 | — | — | source |
Universal connector (RB000167_03) cnc.universal-connector | CNC | 6061 aluminium, 120-grit sandblast + black anodize | 4 | — | — | source |
Universal connector reamed flange (RB000168_02) cnc.universal-flange | CNC | 6061 aluminium, 120-grit sandblast + black anodize | 4 | — | — | source |
Shank (lower leg) (RB000169_02) cnc.shank | CNC | 6061 aluminium, 120-grit sandblast + black anodize | 2 | — | — | source |
Chest rear clamp plate (RB000170_02) cnc.chest-rear | CNC | 6061 aluminium, 120-grit sandblast + black anodize | 1 | — | — | source |
Chest front clamp plate (RB000171_01) cnc.chest-front | CNC | 6061 aluminium, 120-grit sandblast + black anodize | 1 | — | — | source |
Limit pin (RB000172_01) cnc.limit-pin | CNC | 6061 aluminium, 120-grit sandblast + black anodize | 4 | — | — | source |
Shank bearing lock (RB000173_01) cnc.shank-bearing-lock | CNC | 6061 aluminium, 120-grit sandblast + black anodize | 4 | — | — | source |
Waist support (with waist limit block) (RB000174_03) cnc.waist-support | CNC | 7075 aluminium, 120-grit sandblast + black anodize | 1 | — | — | source |
Long connecting rod (RB000175_02) cnc.long-link | CNC | 45 steel, black oxide | 2 | — | — | source |
Short connecting rod (RB000176_02) cnc.short-link | CNC | 45 steel, black oxide | 2 | — | — | source |
Hip clamp plate (RB000177_02) cnc.hip-plate | CNC | 6061 aluminium, 120-grit sandblast + black anodize | 2 | — | — | source |
PCB adapter plate, Orange Pi variant (black) printed.pcb-adapter-orangepi | FDM | PLA (PLA Tough+ per print notes) | 1 | — | — | source |
PCB adapter plate, RDK X5 variant (black) printed.pcb-adapter-rdk | FDM | PLA (PLA Tough+ per print notes) | 1 | — | — | source |
Carrier board mount v2.0 printed.carrier-mount | FDM | PLA Tough+ | 1 | — | — | source |
Rear-thigh calibration jig (50% sparse infill, orientation per print notes) printed.cal-thigh-rear | FDM | PLA Tough+ | 1 | — | — | source |
Foot calibration jig (50% sparse infill, orientation per print notes) printed.cal-foot | FDM | PLA Tough+ | 1 | — | — | source |
Joint calibration jig set: thigh locator x2, elbow x2, shoulder fixture x2, ankle x2, knee x2, waist x1 (quantities from file names) printed.cal-set | FDM | PLA Tough+ | 11 | — | — | source |
Assemble
Every step ends in a check- Steps
- 20
- Subassemblies
- 10
- Hands-on time (sum)
- —
- Critical path
- —
- Your progress · this device
- —
20 steps have no time estimate; times above are lower bounds.
Steps, in build order
- Fabrication01
Order the CNC structural set
Send the STEP files and PDF drawings in A2_cnc_atom01 (or the 送加 'to machine' copy) to a 3-axis CNC shop, with the material and finish per part from A2_CNCBOM: 6061/7075 aluminium sandblasted and black anodized, 45-steel links black oxided.
CHECK26 part numbers and 64 pieces arrive, matching the CNC BOM quantities; the limit pins and dowel pins (4x18/4x22) slide into their bores by hand or with a rubber mallet.- Parts in
- Arm 1 (RB000152_02)cnc.arm-1
- Arm 2 (RB000153_02)cnc.arm-2
- Arm 3 (RB000154_02)cnc.arm-3
- Arm 4 (RB000155_01)cnc.arm-4
- Arm 5 (RB000179_01)cnc.arm-5
- IMU carrier plate (RB000156_01)cnc.imu-plate
- Side cross plate (RB000157_01)cnc.side-plate
- Inner thigh (RB000158_02)cnc.inner-thigh
- Battery bottom cover (with waist limit block) (RB000159_02)cnc.battery-cover
- Shoulder (RB000160_02)cnc.shoulder
- 20 cm foot (RB000161_01)cnc.foot-20cm
- Sole connecting rod (RB000162_01)cnc.sole-link
- Ankle roll connector (RB000163_01)cnc.ankle-roll
- Hip joint mount (RB000164_01)cnc.hip-mount
- Output flange connecting rod (RB000166_02)cnc.flange-link
- Universal connector (RB000167_03)cnc.universal-connector
- Universal connector reamed flange (RB000168_02)cnc.universal-flange
- Shank (lower leg) (RB000169_02)cnc.shank
- Chest rear clamp plate (RB000170_02)cnc.chest-rear
- Chest front clamp plate (RB000171_01)cnc.chest-front
- Limit pin (RB000172_01)cnc.limit-pin
- Shank bearing lock (RB000173_01)cnc.shank-bearing-lock
- Waist support (with waist limit block) (RB000174_03)cnc.waist-support
- Long connecting rod (RB000175_02)cnc.long-link
- Short connecting rod (RB000176_02)cnc.short-link
- Hip clamp plate (RB000177_02)cnc.hip-plate
- Tools
- —
- Torque
- —
- Time
- —
- After
- Start
- Source
- github.com
- 02
Print the mounts and calibration jigs
Print everything in PLA Tough+ at default settings. The rear-thigh and foot calibration jigs use 50% sparse infill and the orientation shown in the print notes; other parts have no orientation requirement.
CHECKThe calibration jigs seat on the CNC thigh, foot and joint parts without forcing, and the PCB adapter holes line up with the controller board.- Parts in
- PCB adapter plate, Orange Pi variant (black)printed.pcb-adapter-orangepi
- PCB adapter plate, RDK X5 variant (black)printed.pcb-adapter-rdk
- Carrier board mount v2.0printed.carrier-mount
- Rear-thigh calibration jig (50% sparse infill, orientation per print notes)printed.cal-thigh-rear
- Foot calibration jig (50% sparse infill, orientation per print notes)printed.cal-foot
- Joint calibration jig set: thigh locator x2, elbow x2, shoulder fixture x2, ankle x2, knee x2, waist x1 (quantities from file names)printed.cal-set
- Tools
- FDM printer
- Torque
- —
- Time
- —
- After
- Start
- Source
- github.com
- 03
Order and inspect the RBE power/CAN board
Order the RBE_PWR_HUB V2.1 PCBA from the published Gerber, BOM and pick-and-place files. The board takes 48 V on XT60, gives 5 V (max 8 A) on USB-C for the controller, 4x XT30(2+2) 48 V + CAN outputs, and USB-C for USB-to-CAN.
CHECKUnpowered, there is no short between the XT60 48 V and GND pins, and the board measures 80 x 60 mm with all four XT30(2+2) outputs populated.- Parts in
- RBE_Board V2.0 / RBE_PWR_HUB V2.1 (RoboParty 3-in-1: 48→5 V buck, power distribution, 4-channel USB-to-CAN)electronics.rbe-board
- Tools
- Digital multimeter
- Torque
- —
- Time
- —
- After
- Start
- Source
- github.com
- Preparation04
Assign motor IDs and calibrate encoders
Safety · human-verified requiredBefore assembly, use the Damiao host tool and FDCAN analyzer to give each motor its slave ID from the body layout and run encoder calibration. IDs: left leg 0x01-0x06, right leg 0x07-0x0C, waist 0x0D, left arm 0x0E-0x12, right arm 0x13-0x17. Do not strike the motors.
CHECKEach of the 23 motors answers the host tool on its assigned ID and is labeled with its joint.This step can hurt a person or ruin parts. Its instructions need sign-off by a human who has done it before relying on them. Stop and ask if anything differs from what you see.
- Parts in
- Damiao DM-J4340P 48 V joint motor (ankles, arms)actuator.dm-j4340p
- Damiao DM-J10010L 48 V joint motor (hip, knee, waist)actuator.dm-j10010l
- Damiao FDCAN analyzer (motor ID setup and encoder calibration)electronics.dm-fdcan-analyzer
- Tools
- Damiao host tool
- Torque
- —
- Time
- —
- After
- Start
- Source
- github.com
- Simulation05
Train and Sim2Sim check (optional)
Install Isaac Sim 5.1.0 + Isaac Lab, `pip install -e ./robolab ./rsl_rl`, train with robolab/scripts/rsl_rl/train.py, export ONNX with --exportonnx, and check it in MuJoCo with robolab/scripts/mujoco/sim2sim_rpo.py.
CHECK`python robolab/scripts/tools/list_envs.py` lists the RPO tasks, and sim2sim_rpo.py runs an exported policy on the RPO MJCF without the robot falling.- Parts in
- —
- Tools
- —
- Torque
- —
- Time
- —
- After
- Start
- Source
- github.com
- Legs06
Legs: thigh, shank, ankle linkage, foot
Manual steps 1-16. Mount the DM-J10010L to the inner thigh (connector vertical, labeled end down) with M4x12 locating screws first, then M4x8 in a diagonal pattern, then swap the locators for M4x8. Fit the two DM-J4340P into the shank, press in the spherical bearings, press the ankle roll connector onto the U-joint cross bearing, add bearing locks, 20 cm foot and rubber sole, the AXK6085 cage (no outer washers) and the limit pin with M4x14. Thread-lock only the last 3-4 threads. Build the other leg as a mirror.
CHECKBoth legs are mirror images; knee and both ankle axes turn by hand through the parallel linkage without binding; no rotor locks up after tightening (if it does, back out the locating screw or use a screw 2 mm shorter).- Parts in
- Damiao DM-J10010L 48 V joint motor (hip, knee, waist)actuator.dm-j10010l
- Damiao DM-J4340P 48 V joint motor (ankles, arms)actuator.dm-j4340p
- Inner thigh (RB000158_02)cnc.inner-thigh
- Shank (lower leg) (RB000169_02)cnc.shank
- Shank bearing lock (RB000173_01)cnc.shank-bearing-lock
- Ankle roll connector (RB000163_01)cnc.ankle-roll
- 20 cm foot (RB000161_01)cnc.foot-20cm
- Sole connecting rod (RB000162_01)cnc.sole-link
- Long connecting rod (RB000175_02)cnc.long-link
- Short connecting rod (RB000176_02)cnc.short-link
- Output flange connecting rod (RB000166_02)cnc.flange-link
- Limit pin (RB000172_01)cnc.limit-pin
- Radial spherical plain bearing, G-series 8 mm, GB/T 9161-2001structure.spherical-bearing-g8
- Universal-joint cross bearing 16x40 (ankle)structure.ujoint-cross-16x40
- Thrust needle roller and cage assembly AXK6085 (fit the cage only, not the two washers)structure.axk6085
- Rubber sole pad (CAD: Roboto_Origin_ShoePad_01-0225.stp)structure.rubber-sole
- Socket head cap screws M2.5x8 (20), M3x6 (20), M3x8 (80), M3x10 (80), M3x12 (50), M3x16 (80)fastener.shcs-m2.5-m3
- Socket head cap screws M4x8 (200), M4x10 (100), M4x12 (100), M4x14 (20)fastener.shcs-m4
- Socket head cap screws M5x10 (80), M5x12 (100), M5x14 (100)fastener.shcs-m5
- Flat-head screws M4x8 (20), M4x12 (20), M5x16 (20)fastener.flat-head
- Tools
- Hex keys, Hand press, Thread locker
- Torque
- —
- Time
- —
- Source
- github.com
- Hip07
Hip: hip plates, universal connectors, yaw/roll motors
Manual steps 17-29. Clamp the hip DM-J10010L between the two hip plates (tap the second plate until it sounds solid), tighten diagonally, then re-tighten at least two rounds. Fit AXK6085 cages, universal connectors with the motor power hole aligned to the threaded hole, and the reamed flanges.
CHECKEach hip motor sits flat in its plates with all screws re-torqued twice, and each hip axis rotates freely by hand.- Parts in
- Damiao DM-J10010L 48 V joint motor (hip, knee, waist)actuator.dm-j10010l
- Hip clamp plate (RB000177_02)cnc.hip-plate
- Universal connector (RB000167_03)cnc.universal-connector
- Universal connector reamed flange (RB000168_02)cnc.universal-flange
- Thrust needle roller and cage assembly AXK6085 (fit the cage only, not the two washers)structure.axk6085
- Socket head cap screws M4x8 (200), M4x10 (100), M4x12 (100), M4x14 (20)fastener.shcs-m4
- Socket head cap screws M5x10 (80), M5x12 (100), M5x14 (100)fastener.shcs-m5
- Socket head cap screws M2.5x8 (20), M3x6 (20), M3x8 (80), M3x10 (80), M3x12 (50), M3x16 (80)fastener.shcs-m2.5-m3
- Tools
- Electric screwdriver, Hammer
- Torque
- —
- Time
- —
- Source
- github.com
- Bring-up08
Flash the USB-to-CAN firmware if the board is blank
roboto_usb2can is gs_usb (candleLight) compatible Zephyr firmware for the STM32G431. The RBE board carries four STM32G431 + ISO1050 CAN channels with 4-pin programming headers. Build with `west build -b roboto_usb2can` or use the release .bin, and flash with `west flash`. Upstream does not say outright that this is the RBE board's image, so check with RoboParty first.
CHECKOn Linux, plugging in the board's USB creates four SocketCAN interfaces (visible in `ip link`).- Parts in
- RBE_Board V2.0 / RBE_PWR_HUB V2.1 (RoboParty 3-in-1: 48→5 V buck, power distribution, 4-channel USB-to-CAN)electronics.rbe-board
- Tools
- STLINK-V3MINIE or other SWD probe, Zephyr SDK / west
- Torque
- —
- Time
- —
- After
- 03
- Source
- github.com
- Hip09
Join legs to hip
Manual steps 30-32: fit the remaining thrust cage and bolt each leg to the hip with M5x10.
CHECKLower body stands on its feet on the bench; each leg swings through hip pitch by hand without touching the other leg.- Parts in
- Thrust needle roller and cage assembly AXK6085 (fit the cage only, not the two washers)structure.axk6085
- Socket head cap screws M5x10 (80), M5x12 (100), M5x14 (100)fastener.shcs-m5
- Tools
- —
- Torque
- —
- Time
- —
- Source
- github.com
- Torso10
Waist joint, IMU, waist support and battery cover
Manual steps 33-41. Mount the waist DM-J10010L in the hip joint mount, add the IMU on its carrier plate, place the assembly on the hip and fasten with M4x12. Fit the 130x165x18 bearing, waist support (limit slot facing the robot's front) and battery cover (limit slot facing the back).
CHECKUpper body turns about ±120° each way before it contacts the limit block, and the IMU plate does not move under finger pressure.- Parts in
- Damiao DM-J10010L 48 V joint motor (hip, knee, waist)actuator.dm-j10010l
- Hip joint mount (RB000164_01)cnc.hip-mount
- IMU carrier plate (RB000156_01)cnc.imu-plate
- HiPNUC HI14M0-USB IMU/VRU (USB-232), 921600 baud, 500 Hzsensor.imu
- Deep-groove ball bearing 130x165x18 (waist), GB/T 276-2013structure.bearing-130x165x18
- Waist support (with waist limit block) (RB000174_03)cnc.waist-support
- Battery bottom cover (with waist limit block) (RB000159_02)cnc.battery-cover
- Socket head cap screws M4x8 (200), M4x10 (100), M4x12 (100), M4x14 (20)fastener.shcs-m4
- Flat-head screws M4x8 (20), M4x12 (20), M5x16 (20)fastener.flat-head
- Socket head cap screws M2.5x8 (20), M3x6 (20), M3x8 (80), M3x10 (80), M3x12 (50), M3x16 (80)fastener.shcs-m2.5-m3
- Tools
- Hand hex wrench for deep screws
- Torque
- —
- Time
- —
- After
- 09
- Source
- github.com
- 11
Chest plates, shoulders, shoulder motors
Manual steps 42-48. Fit the chest clamp plates (M5x10, M4x10), shoulders and side cross plates, leaving one side plate off for the battery. Mount the shoulder DM-J4340P with the connector pointing up, then arm 5 with M3x16; mirror for the other side.
CHECKBoth shoulder motors are connector-up and turn freely; one side plate is still open for battery insertion.- Parts in
- Chest front clamp plate (RB000171_01)cnc.chest-front
- Chest rear clamp plate (RB000170_02)cnc.chest-rear
- Shoulder (RB000160_02)cnc.shoulder
- Side cross plate (RB000157_01)cnc.side-plate
- Arm 5 (RB000179_01)cnc.arm-5
- Damiao DM-J4340P 48 V joint motor (ankles, arms)actuator.dm-j4340p
- Socket head cap screws M4x8 (200), M4x10 (100), M4x12 (100), M4x14 (20)fastener.shcs-m4
- Socket head cap screws M5x10 (80), M5x12 (100), M5x14 (100)fastener.shcs-m5
- Socket head cap screws M2.5x8 (20), M3x6 (20), M3x8 (80), M3x10 (80), M3x12 (50), M3x16 (80)fastener.shcs-m2.5-m3
- Tools
- —
- Torque
- —
- Time
- —
- After
- 10
- Source
- github.com
- Arms12
Upper arms, elbows, forearms
Manual steps 49-55. Build each arm with its DM-J4340P motors (elbow connector down, shoulder connector up), M3x8/M3x10/M3x16 screws with the diagonal locate-then-tighten method; the other arm is a mirror.
CHECKEach arm has 5 motors and every arm joint moves by hand through its range without the arm hitting the torso.- Parts in
- Arm 1 (RB000152_02)cnc.arm-1
- Arm 2 (RB000153_02)cnc.arm-2
- Arm 3 (RB000154_02)cnc.arm-3
- Arm 4 (RB000155_01)cnc.arm-4
- Damiao DM-J4340P 48 V joint motor (ankles, arms)actuator.dm-j4340p
- Socket head cap screws M2.5x8 (20), M3x6 (20), M3x8 (80), M3x10 (80), M3x12 (50), M3x16 (80)fastener.shcs-m2.5-m3
- Tools
- —
- Torque
- —
- Time
- —
- After
- 11
- Source
- github.com
- Electrical13
Install the battery and close the side plate
Safety · human-verified requiredManual steps 56-57. Keep the battery connector capped or taped until it is plugged into the board. Any pack dropped from more than 30 cm must not be installed; quarantine it for 24 h.
CHECKThe battery sits in the torso with the side plate closed (M4x10) and its connector is still insulated.This step can hurt a person or ruin parts. Its instructions need sign-off by a human who has done it before relying on them. Stop and ask if anything differs from what you see.
- Parts in
- 48 V 15 Ah Li-ion pack, 140x140x115 mm (Fu Xiao Er)power.battery
- Side cross plate (RB000157_01)cnc.side-plate
- Socket head cap screws M4x8 (200), M4x10 (100), M4x12 (100), M4x14 (20)fastener.shcs-m4
- Tools
- —
- Torque
- —
- Time
- —
- After
- 12
- Source
- github.com
- 14
Motor daisy-chains and RBE board wiring
Safety · human-verified requiredFollow the wiring guide. Chains: left leg 0x01-0x06, right leg 0x07-0x0C with waist 0x0D on 0x07, left arm 0x0E-0x12, right arm 0x13-0x17. Run 0x01 to CAN0, 0x07 to CAN1, 0x0E to CAN2, 0x13 to CAN3 on the RBE board (left before right, legs before arms). Connect the controller's USB 3.0 port to the board's USB-to-CAN, and the IMU and gamepad receiver to USB 2.0. Fit the wire-guide plates (manual steps 58-63, all M4x8 flat-head), clamp harnesses at the ports and UV-glue the CAN plugs.
CHECKWith the battery unplugged, every chain is continuous from the board to its last motor ID, and CAN0-CAN3 go to left leg, right leg + waist, left arm and right arm.This step can hurt a person or ruin parts. Its instructions need sign-off by a human who has done it before relying on them. Stop and ask if anything differs from what you see.
- Parts in
- RBE_Board V2.0 / RBE_PWR_HUB V2.1 (RoboParty 3-in-1: 48→5 V buck, power distribution, 4-channel USB-to-CAN)electronics.rbe-board
- Carrier board mount v2.0printed.carrier-mount
- Arm harness RBW_Origin_01-04 (Arm01-Arm04), XT30(2+2) to XT30(2+2), 20 cm, 2 of eachcable.arm
- Leg harness RBW_Origin_05-09 (Leg01-Leg05), XT30U / XT30(2+2) with GH1.25 2-pin reversed CAN lead, 10-40 cm, 2 of eachcable.leg
- RBW_Origin_10 Body01, XT30U-XT30U, 20 cm (waist 0x0D to right leg 0x07)cable.body01
- RBW_Origin_11 Body02, XT30(2+2)-XT30(2+2), 20 cm (arms to RBE board)cable.body02
- RBW_Origin_12 Body03, XT30(2+2)-XT30U, 60 cm (left leg 0x01 to RBE board)cable.body03
- RBW_Origin_13 Body04, XT30(2+2)-XT30U, 50 cm (right leg 0x07 to RBE board)cable.body04
- USB-A to USB-C 3.0 cable, 30 cm (controller to RBE USB-to-CAN)cable.usb-a-c
- USB-C to USB-C cable, 30 cm, flexible, fast-charge, side-bend (RBE 5 V to controller)cable.usb-c-c
- Cable-tie mounts (listed as 1 set)other.cable-tie-mount
- Brass standoff M3x15+3fastener.standoff-m3
- Flat-head screws M4x8 (20), M4x12 (20), M5x16 (20)fastener.flat-head
- Tools
- UV glue
- Torque
- —
- Time
- —
- Source
- github.com
- 15
Back panel: power switch, e-stop, charge port, handle
Safety · human-verified requiredManual steps 64-67. Tighten the switch and e-stop in the back plate and clip the e-stop's internal board in place, then fit the charge port and the metal handle. Without the back-panel switch connected, the RBE board has no power output.
CHECKWith the battery connected: the switch turns the board on and off, the voltmeter reads pack voltage (charge if below 50 V), and pressing the e-stop cuts main power.This step can hurt a person or ruin parts. Its instructions need sign-off by a human who has done it before relying on them. Stop and ask if anything differs from what you see.
- Parts in
- Metal push-button switch, self-locking, 5 V green ring light, with leadpower.switch
- Emergency stop button, Lanbo M3 oxidized head, no lightpower.estop
- WEIPU SF1212/S2 aviation connector (charge port)power.charge-port
- Digital voltmeter (GH1.25 connection on the RBE board)power.voltmeter
- Li-ion charger with 3-pin aviation plugpower.charger
- Metal carry handle (back)structure.handle
- Socket head cap screws M6x12 (2), M6x16 (2)fastener.shcs-m6
- Tools
- —
- Torque
- —
- Time
- —
- After
- 14
- Source
- github.com
- Bring-up16
Controller OS, ROS 2 and deployment stack
RDK X5: flash the provided image with the RT kernel preinstalled (built by x5-rdk-gen). Orange Pi 5 Plus: Ubuntu 22.04 and the 5.10 RT kernel .debs in roboparty_deploy/assets. Install ROS 2 Humble, ccache, fmt, spdlog, eigen3, screen, ros-humble-joy, then clone roboparty_deploy with --recursive and add rtprio 98 / memlock unlimited for your user in limits.conf.
CHECKAfter a reboot, `ulimit -r` prints 98 and `colcon build --symlink-install` finishes with no errors.- Parts in
- D-Robotics RDK X5 8 GB single-board computercompute.rdk-x5
- SanDisk 32 GB high-speed microSD card (controller OS image)electronics.sd-card
- RTC module for the controllerelectronics.rtc
- Wi-Fi antenna, IPEX gen-1, 15 cm leadelectronics.antenna
- Controller cooling kit (heatsink/fan set)electronics.cooling-kit
- PCB adapter plate, RDK X5 variant (black)printed.pcb-adapter-rdk
- PCB adapter plate, Orange Pi variant (black)printed.pcb-adapter-orangepi
- Tools
- —
- Torque
- —
- Time
- —
- After
- 15
- Source
- github.com
- 17
CAN and IMU interfaces (udev)
Set the IMU to 921600 baud and 500 Hz (must be above 200 Hz). Copy 99-auto-up-devs-sunrise.rules (RDK X5) or -orangepi.rules into /etc/udev/rules.d, editing KERNELS if your USB ports differ, then reload and reboot. Put the gamepad in XInput mode.
CHECK`ip a` shows can0-can3 up at 1 Mbit/s, the IMU enumerates as /dev/ttyUSB0, and `ros2 service call /read_imu std_srvs/srv/Trigger` returns data.- Parts in
- HiPNUC HI14M0-USB IMU/VRU (USB-232), 921600 baud, 500 Hzsensor.imu
- Gamepad with USB receiver (XInput mode)other.gamepad
- Tools
- HiPNUC host tool
- Torque
- —
- Time
- —
- Source
- github.com
- Calibration18
Pin calibration and motor zeroing
Safety · human-verified requiredLock the arms with 4x18 pins and the legs with 4x22 pins (manual 2.3), and turn the waist yaw counter-clockwise onto its limit block (or fix it with the printed waist jig). A pin only has to go deep enough to stop the joint. Then run `python3 scripts/set_zero.py`, or `/init_motors` followed by `/set_zeros`. In src/inference/robots/rpo/robot.yaml, keep the waist zero offset at 2.093 for limit-block calibration and set it to 0.0 if you used the printed jig.
CHECKWith the pins removed and the robot hung from a gantry, the joint-offset readout shows every joint near joint_default_angle.This step can hurt a person or ruin parts. Its instructions need sign-off by a human who has done it before relying on them. Stop and ask if anything differs from what you see.
- Parts in
- Dowel pin 4x18, 45 steel, GB/T 119.2 (arm calibration pins)fastener.pin-4x18
- Dowel pin 4x22, 45 steel, GB/T 119.2 (leg calibration pins)fastener.pin-4x22
- Limit pin (RB000172_01)cnc.limit-pin
- Rear-thigh calibration jig (50% sparse infill, orientation per print notes)printed.cal-thigh-rear
- Foot calibration jig (50% sparse infill, orientation per print notes)printed.cal-foot
- Joint calibration jig set: thigh locator x2, elbow x2, shoulder fixture x2, ankle x2, knee x2, waist x1 (quantities from file names)printed.cal-set
- Tools
- Rubber mallet, Needle-nose pliers
- Torque
- —
- Time
- —
- After
- 17
- Source
- github.com
- Bring-up19
First enable and reset on a safety gantry
Safety · human-verified requiredWith the robot hanging from a load-rated gantry, run `./tools/start_robot.sh`. Press X to enable (all motor LEDs go from red to green) and X again to confirm disable works, then re-enable. Pose the limbs close to joint_default_angle before pressing A to reset, because a large offset causes a step response that can strip gearboxes.
CHECKX toggles all 23 motor LEDs between red and green, and A moves the robot smoothly to the default pose with no oscillation.This step can hurt a person or ruin parts. Its instructions need sign-off by a human who has done it before relying on them. Stop and ask if anything differs from what you see.
- Parts in
- Gamepad with USB receiver (XInput mode)other.gamepad
- Tools
- —
- Torque
- —
- Time
- —
- After
- 18
- Source
- github.com
- 20
Default walking policy on the ground
Safety · human-verified requiredLower the robot until both feet are flat, sweep both sticks and press LT/RT a few times to clear drift, check `screen -r inference_session` for errors, then press B to start inference with a spotter on the gantry rope. X disables the motors and the physical e-stop cuts power. Keep people at least 1 m away.
CHECKThe robot stands and steps in place when B is pressed, and it follows right-stick commands without drifting sideways.This step can hurt a person or ruin parts. Its instructions need sign-off by a human who has done it before relying on them. Stop and ask if anything differs from what you see.
- Parts in
- 48 V 15 Ah Li-ion pack, 140x140x115 mm (Fu Xiao Er)power.battery
- Tools
- —
- Torque
- —
- Time
- —
- After
- 19
- Source
- github.com
Progress is stored in this browser only (localStorage). Nothing is sent anywhere.
Bring-up
Flash · calibrate · first policy- A
Flash firmware
TargetsRBE board USB-to-CAN (4x STM32G431), RDK X5 image (x5-rdk-gen), Orange Pi 5 Plus image / RT kernel (orangepi-build), Damiao DM-J4340P / DM-J10010L motor IDs (vendor tool)
Repogithub.com/Roboparty/roboparty_deploy
ROS 2 Humble deployment (roboparty_deploy, GPL-3.0-only; submodules roboparty_inference, roboparty_motors, roboparty_imu, roboparty_camera). The motors are Damiao DM over SocketCAN at 1 Mbit/s: can0 left leg (6), can1 right leg + waist (7), can2 left arm (5), can3 right arm (5), master_id_offset 16. The HiPNUC IMU runs on serial at 921600 baud. USB-to-CAN firmware is roboparty_firmware/roboto_usb2can (Zephyr, gs_usb). Board images are built with roboparty_firmware/x5-rdk-gen and orangepi-build (GPL-2.0).
- B
Calibrate
CalibrationPin calibration (4x18 arm pins, 4x22 leg pins, waist limit block or printed waist jig), then scripts/set_zero.py or the /set_zeros ROS 2 service. motor_zero_offset for waist yaw is 2.093 rad (limit block) or 0.0 (printed jig) in robots/rpo/robot.yaml.Log the output. It goes in your build report.
- C
First policy
- walk (default velocity-tracking policy)Isaac Lab + RSL-RL (roboparty_train), ONNX via roboparty_inference source
- walk, AMP styleIsaac Lab + RSL-RL AMP source
- walk, attention encoderIsaac Lab + RSL-RL source
- motion tracking: wave / dance (BeyondMimic)Isaac Lab BeyondMimic source
- get up from the groundIsaac Lab BeyondMimic-style motion tracking source
- interruptible walkingIsaac Lab + RSL-RL source
- parkour with depthIsaac Lab + RSL-RL source
Try the policy in the browser sim before it touches hardware. Keep a hand near the power switch the first time a policy runs on the real robot.
Report your build
Moves ROBOTO_ORIGIN toward L4 · BuiltA build report is the only thing that proves a package works. It raises the level, puts a point on the map, and tells the Foreman which steps to rewrite.
Level gate
Holds L1 · evidence, not confidence- L0Indexed
Known to exist. Atlas page only.
- 5 sources on record(met)
- L1Compiled
Package validates against the spec; every fact has a source.
- Build package compiled(met)
- 27 sources across robot and package(met)
- L2Sim-verified
Loads in browser and GPU sim, mass within tolerance of the BOM, holds a stand. Unlocks .training.
- URDF/MJCF is public(met)
- Sim load, mass tolerance and stand are checked on .training(checked elsewhere)
- L3Sourced
Every BOM line resolves to a live offer in at least two regions. Unlocks the one-click cart.
- 0/42 BOM lines have offers in 2+ regions(not met)
- L4Built
At least one community build report with photos and bring-up logs. Unlocks Build it as the main action.
- 0 reviewed build reports(not met)
- Review feed unreachable at last refresh; count is registry-only(checked elsewhere)
- L5Certified
The robot's maintainer signs the package. Unlocks certified teams and kit sales.
- Maintainer signature not recorded(not met)
Levels are cumulative and set by the registry from reviewed evidence. This panel shows what can be measured from the package today.